
TSB – 03 Piston Seal Installation
Ver 1.0
2023 02 10
Introduction
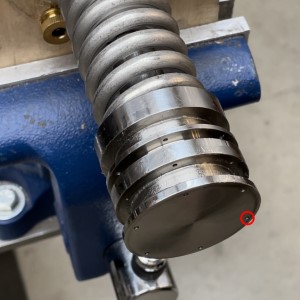
Replacing the piston seals on the Lapera Group
Tools and parts required:
- 2 x chopsticks
- Paperclip
- Seal installation tool
- Dow 111 food-safe silicone grease
- V seal
- X seal
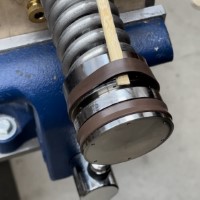
Step 1

Remove the piston assembly from the group following these instructions.
Sharpen the chopsticks to a dull chisel point to help pry up the old seals.
Brown Viton seals will be soft enough to remove with this technique. Black Buna seals will likely be too hard and will need to be cut. Be careful not to damage or mark the stainless steel with the cutting tool.
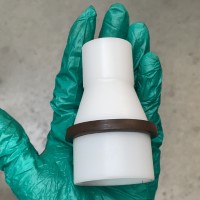
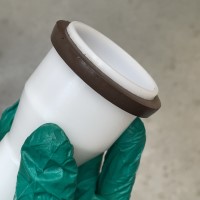
Note the orientation of the seals: the V at the top facing downwards and the X at the bottom.
Step 2
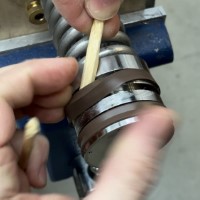
Work both chopsticks under the seal…
…and pull it off the bottom of the piston.
Repeat for the lower X seal.
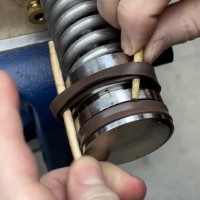
Step 3
Clean the piston grooves and the exterior and, using a paperclip, remove any coffee oil from the six vents. Recoat the piston grooves with a small amount of silicone grease.
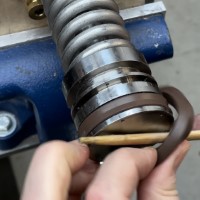
Step 4
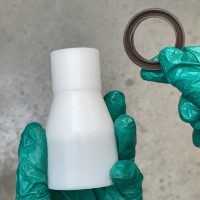
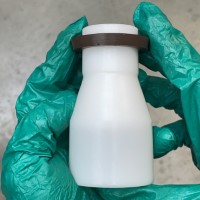
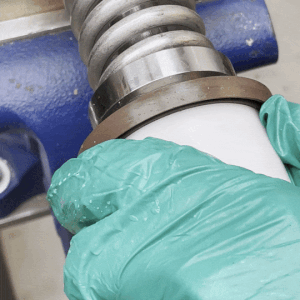
Lightly grease the exterior of the piston tool and the seal. Making sure to orient the V seal in the right direction (with the lips pointing to the small end of the tools), slide the new seal onto the tool.
Step 5
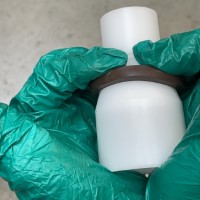
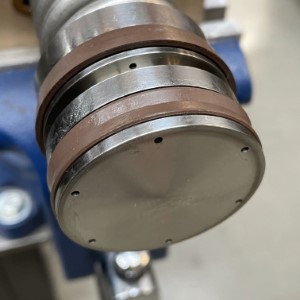
Align the top of the seal with the middle of the upper groove and with a slight twisting motion, push the seal off the end of the installation tool and seat it completely in the groove.
Repeat this procedure for the lower X seal.
Step 6
Done! Reinstall the piston assembly in the group as per the instructions.
Step 7
Make coffee.