
TSB – 10 Group Removal
Ver 1.0
2024 06 12
Introduction
Removal of the Group
Tools and parts required:
- #1 Phillips screwdriver
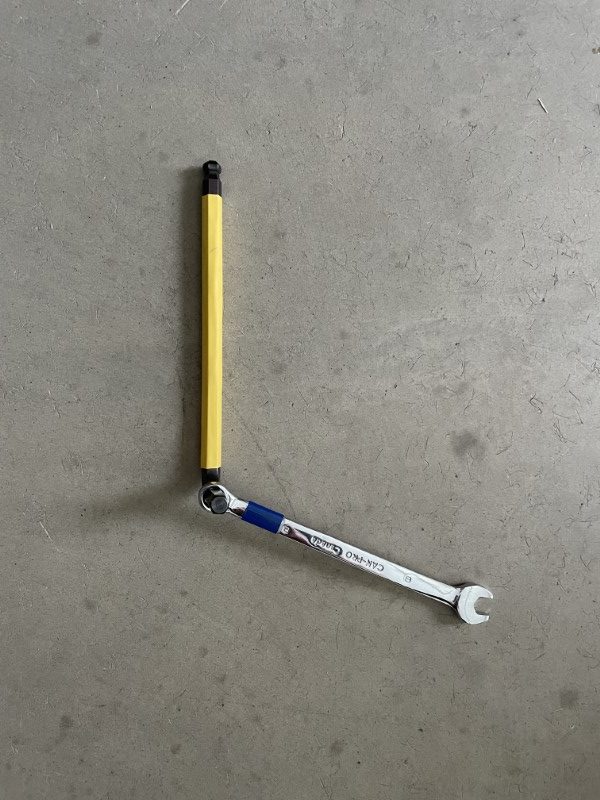
- 8mm ball-end hex key
- Any wrench larger than 8mm (as a handle for the hex wrench)
- 2 small towels
- (Dow 111 food-safe silicone grease for re-installation)

Step 1
Turn off the machine and let it cool.
Turn off the water supply to the machine.
Once the machine is cool, pull a short flush through the group to relieve any residual pressure.
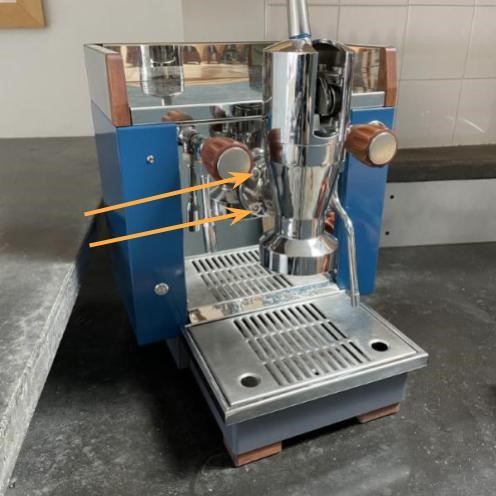
Locate the 4 x M10 screws on the flange at the back of the group.
Step 2
Remove the drip tray and place towels under the machine and under the front edge of the back splash to catch the roughly 50ml water that will come out when you remove the group.
Step 3 – Removing the group:
- Unscrew the lever and put it aside.
- Remove the two small Phillips (cross) screws that hold the group cover, remove the group cover and put it aside.
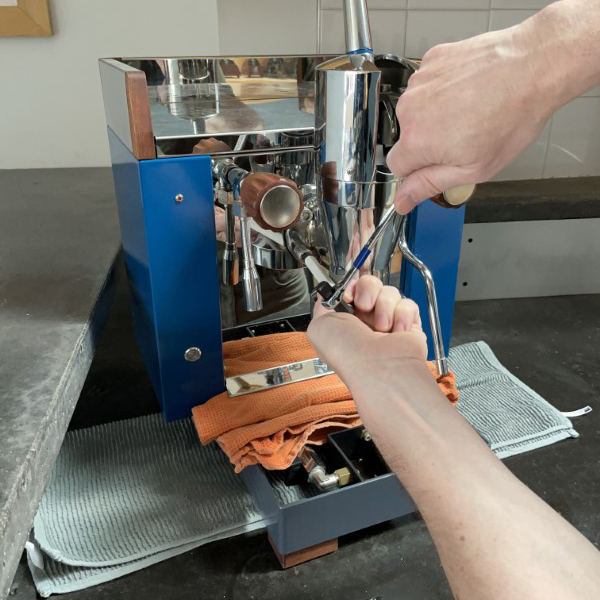
- Barely loosen all four M10 screws on the flange at the back of the group (with an 8mm ball-head hex key) using the boxed end of a wrench for extra leverage. Cover the shaft of the hex key with electrical tape to avoid scratching the group.
- Loosen the screws further until you can tilt the group upwards slightly to allow the water to escape.
- Remove the screws while supporting the group and free the group. The screws have a small amount of anti-seize grease on them, put them in a clean zip lock bag and set them aside.
Note the o-ring seal on the back of the group. It is covered with a thin film of silicone grease. Either store it in a clean zip-lock bag, or clean it with some paper towel and re-apply silicone grease before re-installing the group. The grease serves a dual purpose: it enhances the seal and is holds the o-ring in its groove during installation.